
The roller coaster ride always ends safely. You can finish Supta Konasana safely with a little practice.
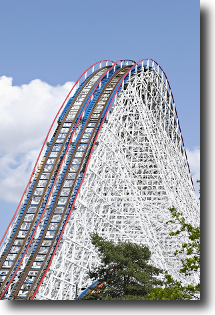
You are rushing forward with tremendous speed. The turn is approaching too fast. You are holding onto your safety harness. Is your car going to stay on the track or are you going to go flying off of the roller coaster and into the parking lot?
Sometimes you can feel like this with your yoga practice. In the yoga pose Supta Konasana there is a roller coaster moment when you reach the balance point in the pose and then your heels go rushing towards the floor. How are they ever going to survive the landing.
What is Supta Konasana
Supta Konasana is the first reclining pose in the Primary series of Ashstanga Yoga. When you do Supta Konasana you are stretching your neck, shoulder and back muscles. This is a fairly simple pose to complete if you have enough flexibility in your hips and shoulders.
How to do the pose
You start this pose from Dandasana. Seated on the floor with your legs together straight out in front of you. From here you lay on your back.
- Exhaling you lift your legs and hips off of the floor. You bring your hips above your shoulders and lower your toes to the floor beyond your head. You can use your hands on your back to assist with getting your hips up over your shoulders.
- Once your toes are on the floor you spread your legs apart about 90 degrees and hold on to your big toes with the first two fingers of your hand. Your palms are facing each other as you hold your toes.
- Now you hold here in the pose for five breathes with your gaze to the ceiling.
To exit the pose you begin your roller coaster ride by:
- Inhale and roll up to balance with your hips on the floor, your back and legs straight and up in the air in an open “V”.
- You pause at the top of the roller coaster trip for an instant and then exhale as you let your legs land on the floor.
- Once your legs are on the floor you then lower your torso to the floor between your legs and bring your nose and forehead to the floor completing the roller coaster trip.
- Inhale and lift your torso from the floor and return to Dandasana.
You can injure your heels if you try to bring your legs to the floor on the exit before you have enough flexibility in your hips.
How to tell if you are ready to land your legs on the floor
Sitting up tall with the legs spread take a hold of your big toes as if you were doing the pose. Now lift your heels off of the floor by pulling back on your toes.
If your back is straight and your heels are lifting easily off of the floor and you can hold them there with ease then you are ready to start working on the landing part of the pose.
If your heels are not rising with ease or you are having difficulty holding on to your toes then you need to take an alternate approach to the landing portion of this roller coaster ride to protect your heels.
How to avoid injuring your heels on the landing
There are three stages that you go through as you learn how to land your legs on the floor without crashing your heels.
These three stages are:
- roll up to balance
- bend your knees
- do the roller coaster
You need to go through the first two stages before you can land your heels safely on the floor without crashing. We will start by looking first at how to come to balance.
Stage 1 – roll up to balance
You are laying on your back with your shoulders and toes on the floor and your hips in the air. You are holding on to your toes.
Now you need to figure out how much force to apply to come up to the balance point at the peak of the roller coaster ride and stay there.
If you apply too much effort you will end up flying over the top of the peak and your roller coaster car will crash into the floor.
If you do not apply enough effort then your roller coaster car will not make it to the peak and it will roll back down to its starting position.
It will take many repetitions to get the force just right, but eventually you will be able to roll up to the peak of the roller coaster track and balance there. When you are able to make this happen consistently then you are ready to move on to the next stage and bring your roller coaster car safely to a landing on the floor by bending your knees.
Stage 2 – bend your knees
Your are in this stage if you have not yet developed the flexibility in your hips enough to keep your heels off of the floor in the test you did above.
In this stage to safely land your legs on the floor you:
- Roll up to balance as described in Stage 1 and then rather than landing with your legs straight and crashing your heels on the floor you bend your knees and bring your heels gently to the floor closer to your hips.
- Once you heels are safely on the floor you slide them away from your hips until your legs are flat on the floor.
- Finally you lower your torso to the floor between your legs to complete the pose.
Once you have learned how to come up to the balance point and you are bending your knees and landing safely it is time to move onto Stage 3 and do the roller coaster.
Stage 3 – Do the roller coaster
You enter this stage when you pass the test above and you can easily hold your heels above the floor and you can roll up to balance.
The challenge here is to behave like the car on the roller coaster ride and come safely to a stop at the end of the ride. The roller coaster car slowly rises up one side of the track and at the highest point it almost comes to a stop before it starts flying down the other side.
You learned how to slowly rise up to balance in Stage 1.
As you roll over the peak and start your descent towards the floor you pull back on your toes to lift your heels and lower your calf muscles. At the same time you move your head rapidly backwards away from your feet to help slow the descent of your feet. These two actions will help to slow the descent of your legs and before you know it you have landed your legs safely and softly on the floor without crashing your heels.
Congratulations you have successfully completed the roller coaster ride and brought your car safely to the end of the ride. The next time around, just like a real roller coaster ride, it will not be nearly as scary.
Next Steps
Your teacher can help you to learn this pose and avoid injuring your heels. They will be able to tell you when you are ready to move from Stage 1 rolling up to balance to Stage 2 bending your knees and then finally on to the full roller coaster.
You are rushing forward with tremendous speed. The turn is approaching too fast. You are holding onto your safety harness. Is your car going to stay on the track or are you going to go flying off of the roller coaster and into the parking lot?Sometimes you can feel like this with your yoga practice. In the yoga pose Supta Konasana there is a roller coaster moment when you reach the balance point in the pose and then your heels go rushing towards the floor. How are they ever going to survive the landing.
What is Supta Konasana
Supta Konasana is the first reclining pose in the Primary series of Ashstanga Yoga. When you do Supta Konasana you are stretching your neck, shoulder and back muscles. This is a fairly simple pose to complete if you have enough flexibility in your hips and shoulders.
How to do the pose
You start this pose from Dandasana. Seated on the floor with your legs together straight out in front of you. From here you lay on your back.
— Exhaling you lift your legs and hips off of the floor. You bring your hips above your shoulders and lower your toes to the floor beyond your head. You can use your hands on your back to assist with getting your hips up over your shoulders.
— Once your toes are on the floor you spread your legs apart about 90 degrees and hold on to your big toes with the first two fingers of your hand. Your palms are facing each other as you hold your toes.
— Now you hold here in the pose for five breathes with your gaze to the ceiling.
To exit the pose you begin your roller coaster ride by:
— Inhale and roll up to balance with your hips on the floor, your back and legs straight and up in the air in an open “V”.
— You pause at the top of the roller coaster trip for an instant and then exhale as you let your legs land on the floor.
— Once your legs are on the floor you then lower your torso to the floor between your legs and bring your nose and forehead to the floor completing the roller coaster trip.
— Inhale and lift your torso from the floor and return to Dandasana.
You can injure your heels if you try to bring your legs to the floor on the exit before you have enough flexibility in your hips.
How to tell if you are ready to land your legs on the floor
Sitting up tall with the legs spread take a hold of your toes. Now lift your heels off of the floor by pulling back on your toes.
If your back is straight and your heels are lifting easily off of the floor and you can hold them there with ease then you are ready to start working on the landing part of the pose.
If your heels are not rising with ease or you are having difficulty holding on to your toes then you need to take an alternate approach to the landing portion of this roller coaster ride to protect your heels.
How to avoid injury to your heels on the landing
There are three stages that you go through as you learn how to get land your legs on the floor with out crashing your heels.
These three stages are:
1 – roll up to balance
2 – bend your knees
3 – do the roller coaster
You need to go through the first two stages before you can land your heels safely on the floor with out crashing. We will start by looking at how to come to balance.
Stage 1 – roll up to balance
You are laying on your back with your shoulders and toes on the floor and your hips in the air. You are holding on to your toes.
Now you need to figure out how much force you need to apply to come up to balance point at the peak of the roller coaster and stay there.
If you apply too much effort you will end up flying over the top of the peak and your roller coaster car will crash into the floor.
If you do not apply enough effort then your roller coaster car will not make it to the peak and it will roll back down to its starting position.
It will take many repetitions to get the force just right, but eventually you will be able to roll up to the peak of the roller coaster track and balance there. When you are able to make this happen consistently then you are ready to move on to the next stage and bring your roller coaster car safely to a landing on the floor by bending your knees.
Stage 2 – bend your knees
Your are in this stage if you have not yet developed the flexibility in your hips enough to keep your heels off of the floor in the test you did above.
In this stage to safely land your legs on the floor you:
— roll up to balance as described in Stage 1 and then rather than landing with your legs straight and crashing your heels on the floor you bend your knees and bring your heels gently to the floor closer to your hips.
— Once you heels are safely on the floor you slide them away from your hips until your legs are flat on the floor.
— Finally you lower your torso to the floor between your legs to complete the pose.
Once you have learned how to come up to the balance point and you are bending your knees and landing safely it is time to move onto Stage 3 and do the roller coaster.
Stage 3 – Do the roller coaster
You enter this stage when you pass the test above and you can easily hold your heels above the floor.
The challenge here is to behave like the car on the roller coaster ride and come safely to a stop. The roller coaster car slowly rises up one side of the track and at the highest point it almost comes to a stop before it starts flying down the other side.
You learned how to slowly rise up to balance in Stage 1.
As you roll over the peak and start your descent towards the floor you pull back on your toes to lift your heels and lower your calf muscles. At the same time you move your head rapidly backwards away from your feet to help slow the descent of your feet. These two actions will help to slow the descent of your legs and before you know it you have landed your legs safely on the floor without crashing your heels.
Congratulations you have successfully completed the roller coaster ride. The next time around it will not be nearly as scary as the first time.
Next Steps
Your teacher can help you to learn this pose and avoid injuring your heels. They will be able to tell you when you are ready to move from Stage 1 rolling up to balance on to Stage 2 bending the knees and then finally on to the full roll coaster.